Learn how to insert images and caption them. Examples for a single figure, and multiple figures next to each other, using the subfigure environment.
Captioned images / figures in LaTeX Image positioning / setting the float Multiple images / subfigures in LaTeX
Captioned images / figures in LaTeX
From time to time, it’s necessary to add pictures to your documents. Using LaTeX all pictures will be indexed automatically and tagged with successive numbers when using the figure environment and the graphicx package.
\documentclass{article}
\usepackage{graphicx}
\begin{document}
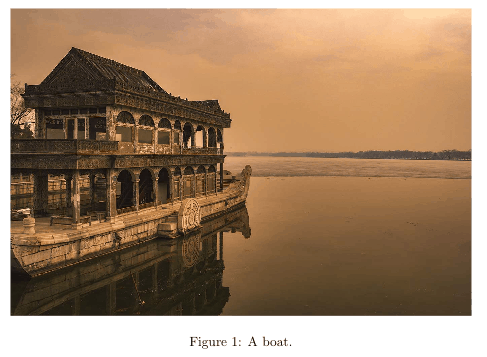
\begin{figure}
\includegraphics[width=\linewidth]{boat.jpg}
\caption{A boat.}
\label{fig:boat1}
\end{figure}
Figure \ref{fig:boat1} shows a boat.
\end{document}
The code above will create the following pdf:

The figure environment takes care of the numbering and positioning of the image within the document. In order to include a figure, you must use the \includegraphics command. It takes the image width as an option in brackets and the path to your image file. As you can see, I put \linewidth into the brackets, which means the picture will be scaled to fit the width of the document. As a result smaller pictures are upscaled and larger pictures downscaled respectively. As I mentioned before the brackets contain the path to the image. In this case the image is stored in the same directory as my .tex file, so I simply put boat.jpg here to include it. For large documents, you probably want to store image files in a different folder, say we created a folder images, then we would simply write images/boat.jpg into the braces. In the next command we set a \caption, which is the text shown below the image and a \label which is invisible, but useful if we want to refer to our figure in our document. You can use the \ref command to refer to the figure (marked by label) in your text and it will then be replaced by the correct number. LaTeX is smart enough to retrieve the correct numbers for all your images automatically. Note that you will need to include the graphicx package in order to use this code.
Image positioning / setting the float
At some point, you will notice that the figure doesn’t necessarily show up in the exact place as you put your code in the .tex file. If your document contains a lot of text, it’s possible that LaTeX will put the picture on the next page, or any other page where it finds sufficient space. To prevent this behavior, it’s necessary to set the float value for the figure environment.
%...
\begin{figure}[h!]
%...
Setting the float by adding [h!] behind the figure environment \begin tag will force the figure to be shown at the location in the document. Possible values are:
- h (here) – same location
- t (top) – top of page
- b (bottom) – bottom of page
- p (page) – on an extra page
- ! (override) – will force the specified location
However, I have only used the [h!] option so far. The float package (\usepackage{float}) allows to set the option to [H], which is even stricter than [h!].
Multiple images / subfigures in LaTeX
Sometimes when writing a document, adding single images is not optimal, especially when the reader is supposed to compare several results or graphs. In such situations, it might be necessary to use a different environment, called subfigure. The subfigure environment allows you to place multiple images at a certain location next to each other and the usage is pretty straightforward.
First you need to add the subcaption package to your preamble:
\documentclass{article}

\usepackage{graphicx}
\usepackage{subcaption}

\begin{document}

%...

\end{document}
Next, you need to add multiple subfigure environments within a figure environment.
%...

\begin{figure}[h!]
  \centering
  \begin{subfigure}[b]{0.4\linewidth}
    \includegraphics[width=\linewidth]{coffee.jpg}
    \caption{Coffee.}
  \end{subfigure}
  \begin{subfigure}[b]{0.4\linewidth}
    \includegraphics[width=\linewidth]{coffee.jpg}
    \caption{More coffee.}
  \end{subfigure}
  \caption{The same cup of coffee. Two times.}
  \label{fig:coffee}
\end{figure}

%...
This will show two pictures next to each other in your document, like this:
If you look closely, you will see, that I’ve set the width of the image manually:
%...
\begin{subfigure}[b]{0.4\linewidth}
%...
and even though there are two images aligned next to each other, their widths are both set to 0.4, yet they fill up the whole space. You should always set this value to .1 less than you expect. If you want to align three images next to each other, you should consecutively add three subfigures, each with a 0.2\linewidth. I suggest, if you need some other arrangement, you simply play around with the width factor until you are satisfied with the result. A more elaborate example with multiple rows and columns could look like this:
%...
\begin{figure}[h!]
  \centering
  \begin{subfigure}[b]{0.2\linewidth}
    \includegraphics[width=\linewidth]{coffee.jpg}
     \caption{Coffee.}
  \end{subfigure}
  \begin{subfigure}[b]{0.2\linewidth}
    \includegraphics[width=\linewidth]{coffee.jpg}
    \caption{More coffee.}
  \end{subfigure}
  \begin{subfigure}[b]{0.2\linewidth}
    \includegraphics[width=\linewidth]{coffee.jpg}
    \caption{Tasty coffee.}
  \end{subfigure}
  \begin{subfigure}[b]{0.5\linewidth}
    \includegraphics[width=\linewidth]{coffee.jpg}
    \caption{Too much coffee.}
  \end{subfigure}
  \caption{The same cup of coffee. Multiple times.}
  \label{fig:coffee3}
\end{figure}
%...
This will print out the following figure in your document:
If you would like to learn more about subfigures, I invite you to read this complete guide!
Summary
- Use the graphicx package and figure environment to embed pictures
- Pictures will be numbered automatically
- Change the width of your image by using \includegraphics[width=\linewidth]{}
- Refer to pictures in your document by setting a \label and using the \ref tag
- Set the position of your image by adding a float option such as [h!]
- If you want to show multiple figures next to each other, use the subcaption package and the subfigure environment
Next Lesson: